Google gives qualifying nonprofit organizations up to $10,000 per month in free text search ads.
This mighty grant is often underappreciated due to the complexity of navigating the Google Ads system and Grants program requirements. However, with some elbow grease, that grant can drive more awareness, engagement, and support for your cause. Over time, it can become a low-maitanence powerhouse for your organization.
Whether you put time or money towards the task, using the grant is worth your while; more than 75% of search traffic goes through Google alone, and Google Ads have an 8:1 return on investment (ROI).
Are you sold on using your free money yet?
If so, start by making sure your organization is registered for the program:
- Apply for the Google for Nonprofits program
- Once approved, activate the Ad Grant
- Link the Ads account with Google Analytics
- Set up conversion tracking on your website (you can email the code with instructions easily within the system to the right person)
Once you have your grant secured and your account set up, you’re ready to get started!
To get your blank account off the ground, you need to:
- Decide on your campaign structure
- Research effective keywords
At this point, take a deep breath. It’s easy to feel overwhelmed and then throw spaghetti at the wall. Resist the urge.
In order for your efforts to succeed, you need to stay organized. Your account can get messy fast. By keeping it orderly, you enable your future self to learn what’s working and optimize effectively.
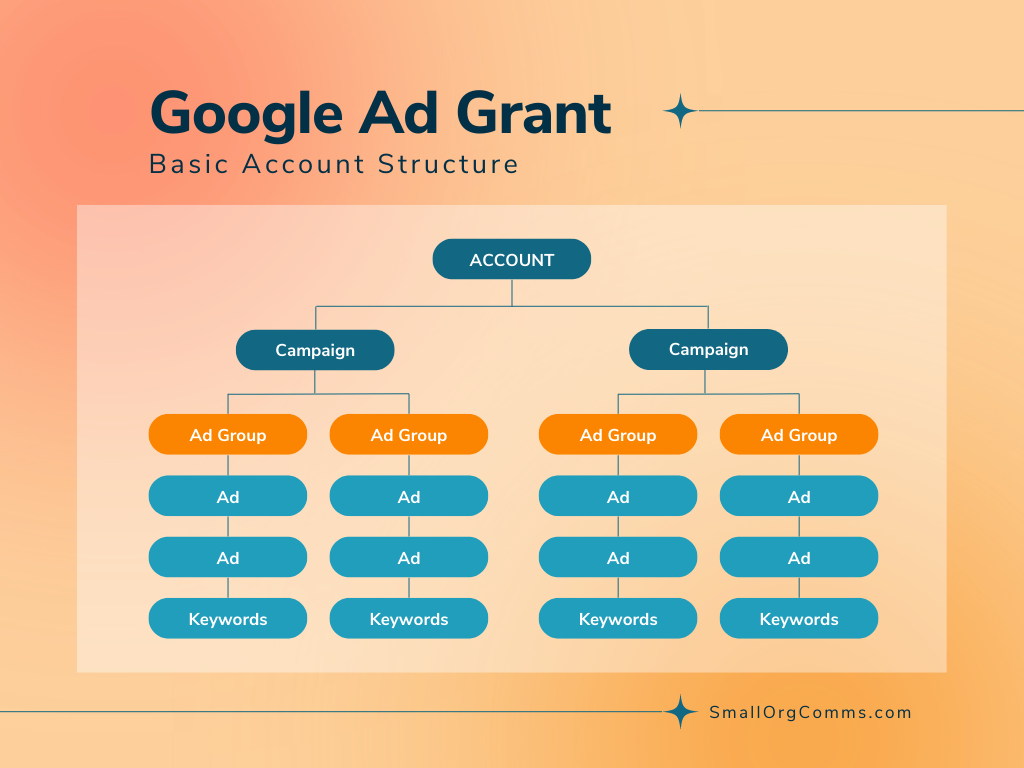
Google Ads are structured in logical treemaps with campaigns at the top, ad groups under campaigns, and then ads and keywords in each ad group. The basic structure looks like this:

The simplest way to approach your campaign structure is to use your own website navigation as a guide. Look through your navigation pages and think about where you'd like to drive search traffic. Often top-level items are a good starting point for your campaign buckets with some sub-navigation items becoming your ad groups. This structure might not work in every case, but it’s a helpful framework for starting out.
Using a spreadsheet, map out the top-level campaigns, sub-level ad groups, and landing page URLs with clear, simple labels. Campaign and ad group labels are only for internal use, so they don’t need to be complicated or polished.
Now, let’s shift to your keyword research by thinking about your goals at the ad group level. Keywords are words or phrases that users put into a search engine, often with some intent in mind, that might trigger your ad to appear in their results. Think about your ideal user and what they might be looking for when they stumble across your ad.
Here’s an example to illustrate what this process might look like: Imagine you work at your local food bank. You start off with a few straightforward campaigns including one titled “Donors” and another titled “Clients” and set locations to your catchment area. Within your “Clients” campaign you set up two ad groups, one titled “Urgent Visit” and the other titled “Diaper Bank” with the goal of sending users to the emergency visit scheduling page and diaper size request form, respectively.
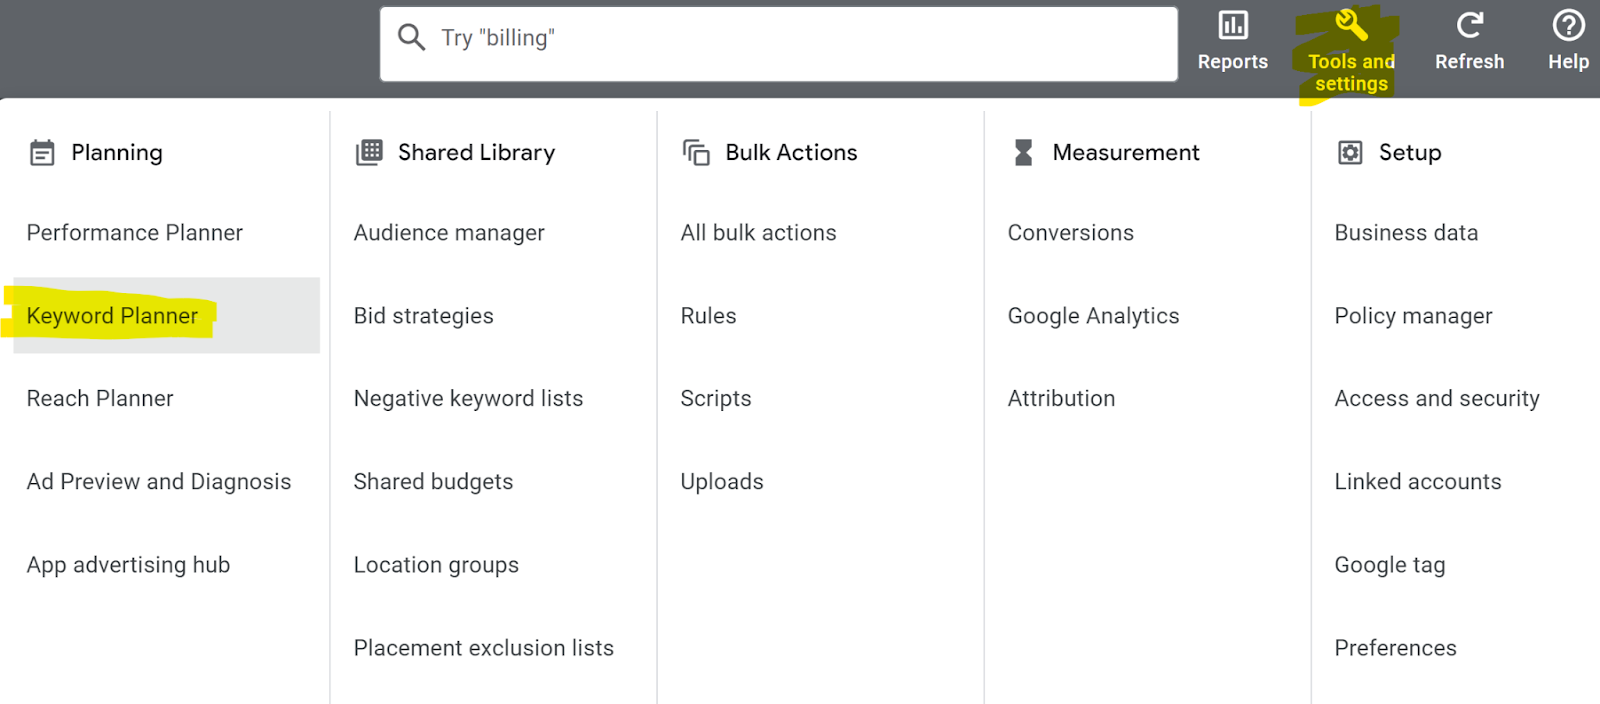
When researching keywords for the “Diaper Bank” ad group, you’re looking for phrases that your potential clients use on Google to find the resource you offer. The first place to begin is in your account with Google’s Keyword Planner.

You can use this to find keywords for your ad groups by search volume, competition, and more.
Finding the right words and phrases takes thought, research, and time. There are many other free and paid tools available to get you started, including:
At the outset, your goal is to find about 10 high-quality phrases for each ad group. You can keep the phrases to “broad match” settings which means similar search queries (and not only exact phrases) could surface your ad. Over time, as your account learns and gathers data, use the search queries that surface your ad to choose strategic negative keywords as well.
Once you’ve decided on the keywords to begin your account, look back at your campaign structure and adjust it according to your data. For instance, you may choose to add a campaign or change an ad group based on what users are searching for in your location. Remember, this is just a starting point. As your account gains traction and history, you will have much more information to use for iteration and experimentation. The most important part is to stay organized so that you can learn from the data.
Now it’s time to write your ads. Each ad has a few headlines and descriptions that Google rotates to find what works well. Each has a character limit, 30 characters and 90 characters respectively, and should reflect the keywords that pulled up the ad. I recommend writing one strong ad per ad group, with at least five headlines and three descriptions, and then duplicating it save for one significant change to A/B test the two ad group ads (and fulfill your Grants requirement).
Once your ads start running, it takes five days for the account to learn and start delivering the ads to users. After a few weeks, take a look at the results and make adjustments based on the data.
Because everything in ads takes time to deliver and assess, Google builds grace periods into the process. When you first start the account, you have 90 days to make sure it’s compliant with Google Ad Grants rules. After that, for any additions or changes, you have two months to meet the standards before risking account deactivation.
Every few weeks, take a look at this checklist to make sure your account is compliant:
Account-level:
- Minimum 5% click-through rate (CTR) on a monthly basis
- Minimum of two sitelink extensions setup
- Total daily budget capped at $329
- Take the annual Google Ad Grants survey when it arrives
Campaign-Level
- Target one or more specific locations
- Set to a conversion-based strategy such as “Maximize Conversions”
- Daily budget is set as a portion of the $329 given to the account
- Minimum of two ad groups per campaign
Ad-Group Level
- Minimum of two ads per group
- Set up a list of high-quality keyword phrases
- Pause keywords with a quality score under 3
- Avoid very generic keywords
- No single-word keywords (with some exceptions)
- Add at least four negative keywords
Once your ads are running, your account starts to build a treasure trove of personalized data. It’s important to use your Google Ads and Analytics accounts to understand what’s working well and what needs improvement over time.
Stay curious, dip deep, and keep learning - I promise, it’s worth it.
About Double
Double is an engaging and friendly donation checkout trusted by nonprofits of all sizes to double their donations.


Faigy Gilder helps small-staff nonprofits communicate their outsized impact. She brings more than a decade of experience to her work. You can learn more and get in touch at www.SmallOrgComms.com


